Compile and Train a Hugging Face Transformers Trainer Model for Question and Answering with the SQuAD dataset
This notebook’s CI test result for us-west-2 is as follows. CI test results in other regions can be found at the end of the notebook.
SageMaker Training Compiler Overview
SageMaker Training Compiler is a capability of SageMaker that makes these hard-to-implement optimizations to reduce training time on GPU instances. The compiler optimizes DL models to accelerate training by more efficiently using SageMaker machine learning (ML) GPU instances. SageMaker Training Compiler is available at no additional charge within SageMaker and can help reduce total billable time as it accelerates training.
SageMaker Training Compiler is integrated into the AWS Deep Learning Containers (DLCs). Using the SageMaker Training Compiler enabled AWS DLCs, you can compile and optimize training jobs on GPU instances with minimal changes to your code. Bring your deep learning models to SageMaker and enable SageMaker Training Compiler to accelerate the speed of your training job on SageMaker ML instances for accelerated computing.
For more information, see SageMaker Training Compiler in the Amazon SageMaker Developer Guide.
Introduction
This example notebook demonstrates how to compile and fine-tune a question and answering NLP task. We use HuggingFace’s transformers and datasets libraries with Amazon SageMaker Training Compiler to accelerate fine-tuning of a pre-trained transformer model on question and answering. In particular, the pre-trained model will be fine-tuned using the SQuAD dataset. To get started, we need to set up the environment with a few prerequisite steps to add permissions, configurations, and so on.
NOTE: You can run this demo in SageMaker Studio, SageMaker notebook instances, or your local machine with AWS CLI set up. If using SageMaker Studio or SageMaker notebook instances, make sure you choose one of the PyTorch-based kernels, Python 3 (PyTorch x.y Python 3.x CPU Optimized) or conda_pytorch_p36 respectively.
NOTE: This notebook uses two ml.g5.4xlarge instances that have single GPU. If you don’t have enough quota, see Request a service quota increase for SageMaker resources.
Prepare SageMaker Environment and Permissions
Installation
This example notebook requires the SageMaker Python SDK v2.133.0.
[ ]:
!pip install botocore boto3 awscli s3fs typing-extensions pandas numpy "sagemaker>=2.133.0" "torch==1.12.0" --upgrade
[ ]:
!pip install transformers datasets --upgrade
[ ]:
import botocore
import boto3
import sagemaker
import transformers

print(f"sagemaker: {sagemaker.__version__}")
print(f"transformers: {transformers.__version__}")
Copy and run the following code if you need to upgrade ipywidgets for datasets library and restart kernel. This is only needed when preprocessing is done in the notebook.
%%capture
import IPython
!conda install -c conda-forge ipywidgets -y
# has to restart kernel for the updates to be applied
IPython.Application.instance().kernel.do_shutdown(True)
SageMaker environment
Note: If you are going to use SageMaker in a local environment. You need access to an IAM Role with the required permissions for SageMaker. To learn more, see SageMaker Roles.
[ ]:
import sagemaker

sess = sagemaker.Session()
# sagemaker session bucket -> used for uploading data, models and logs
# sagemaker will automatically create this bucket if it does not exists
sagemaker_session_bucket = None
if sagemaker_session_bucket is None and sess is not None:
    # set to default bucket if a bucket name is not given
    sagemaker_session_bucket = sess.default_bucket()

role = sagemaker.get_execution_role()
sess = sagemaker.Session(default_bucket=sagemaker_session_bucket)

print(f"sagemaker role arn: {role}")
print(f"sagemaker bucket: {sess.default_bucket()}")
print(f"sagemaker session region: {sess.boto_region_name}")
Loading the SQuAD dataset
When using the 🤗 Datasets library, datasets can be downloaded directly with the following datasets.load_dataset() method:
from datasets import load_dataset
load_dataset('dataset_name')
If you’d like to try other training datasets later, you can simply use this method.
For this example notebook, we prepared the SQuAD v1.1 dataset in the public SageMaker sample file S3 bucket. The following code cells show how you can directly load the dataset and convert to a HuggingFace DatasetDict.
NOTE: The SQuAD dataset is under the CC BY-SA 4.0 license terms.
[ ]:
import pandas as pd
import numpy as np
import json
from datasets import Dataset
from datasets import DatasetDict
from datasets.filesystems import S3FileSystem
[ ]:
pd.__version__
[ ]:
# helper function to grab the dataset and load into DatasetDict
import urllib.request


def make_split(split):
    if split == "train":
        file = f"https://sagemaker-example-files-prod-{sess.boto_region_name}.s3.amazonaws.com/datasets/text/squad/train-v1.1.json"
    elif split == "test":
        file = f"https://sagemaker-example-files-prod-{sess.boto_region_name}.s3.amazonaws.com/datasets/text/squad/dev-v1.1.json"
    with urllib.request.urlopen(file) as f:
        squad = json.load(f)
        data = []
        for article in squad["data"]:
            title = article.get("title", "")
            for paragraph in article["paragraphs"]:
                context = paragraph["context"]  # do not strip leading blank spaces GH-2585
                for qa in paragraph["qas"]:
                    answer_starts = [answer["answer_start"] for answer in qa["answers"]]
                    answers = [answer["text"] for answer in qa["answers"]]
                    # Features currently used are "context", "question", and "answers".
                    # Others are extracted here for the ease of future expansions.
                    data.append(
                        {
                            "title": title,
                            "context": context,
                            "question": qa["question"],
                            "id": qa["id"],
                            "answers": {
                                "answer_start": answer_starts,
                                "text": answers,
                            },
                        }
                    )
        df = pd.DataFrame(data)
        return Dataset.from_pandas(df)


train = make_split("train")
test = make_split("test")

datasets = DatasetDict()
datasets["train"] = train
datasets["validation"] = test
datasets
We will slice off 15,000 training samples and 1500 test samples.
[ ]:
datasets["train"] = datasets["train"].select(range(15000))
datasets["validation"] = datasets["validation"].select(range(1500))
The datasets object itself is `DatasetDict <https://huggingface.co/docs/datasets/package_reference/main_classes.html#datasetdict>`__, which contains one key for the training, validation and test set.
Preprocessing
Before we can feed those texts to the Trainer model, we need to preprocess them. This can be done by a 🤗 Transformers Tokenizer which (as the name indicates) tokenizes the input texts (including converting the tokens to their corresponding IDs in the pretrained vocabulary) and put them into a format the model expects, as well as generate other inputs that the model requires.
To do this, we instantiate a tokenizer using the AutoTokenizer.from_pretrained method, which will ensure that:
We get a tokenizer that corresponds to the model architecture we want to use.
We download the vocabulary used when pretraining this specific checkpoint.
That vocabulary will be cached, so it’s not downloaded again when you run the cell.
[ ]:
model_checkpoint = "albert-base-v2"

from transformers import AutoTokenizer

tokenizer = AutoTokenizer.from_pretrained(model_checkpoint)
The following assertion ensures that our tokenizer is a fast tokenizer (backed by Rust) from the 🤗 Tokenizers library. Those fast tokenizers are available for almost all models, and we will need some of the special features they have for our preprocessing.
[ ]:
import transformers

assert isinstance(tokenizer, transformers.PreTrainedTokenizerFast)
You can check which type of models have a fast tokenizer available and which don’t on the big table of models.
[ ]:
max_length = 384  # The maximum length of a feature (question and context)
doc_stride = (
    128  # The authorized overlap between two parts of the context when splitting it is needed.
)
We need to add padding to the right which is specific to the model:
[ ]:
pad_on_right = tokenizer.padding_side == "right"
Now, let’s put everything together in one function that we will apply to our training set. In the case of impossible answers (the answer is in another feature given by an example with a long context), we set the cls index for both the start and end position. We could also simply discard those examples from the training set if the flag allow_impossible_answers is False. Because the preprocessing is already complex enough as it is, we’ve kept is simple for this part.
[ ]:
def prepare_train_features(examples):
    # Some of the questions have lots of whitespace on the left, which is not useful and will make the
    # truncation of the context fail (the tokenized question will take a lots of space). So we remove that
    # left whitespace
    examples["question"] = [q.lstrip() for q in examples["question"]]

    # Tokenize our examples with truncation and padding, but keep the overflows using a stride. This results
    # in one example possibly giving several features when a context is long, each of those features having a
    # context that overlaps a bit the context of the previous feature.
    tokenized_examples = tokenizer(
        examples["question" if pad_on_right else "context"],
        examples["context" if pad_on_right else "question"],
        truncation="only_second" if pad_on_right else "only_first",
        max_length=max_length,
        stride=doc_stride,
        return_overflowing_tokens=True,
        return_offsets_mapping=True,
        padding="max_length",
    )

    # Since one example might give us several features if it has a long context, we need a map from a feature to
    # its corresponding example. This key gives us just that.
    sample_mapping = tokenized_examples.pop("overflow_to_sample_mapping")
    # The offset mappings will give us a map from token to character position in the original context. This will
    # help us compute the start_positions and end_positions.
    offset_mapping = tokenized_examples.pop("offset_mapping")

    # Let's label those examples!
    tokenized_examples["start_positions"] = []
    tokenized_examples["end_positions"] = []

    for i, offsets in enumerate(offset_mapping):
        # We will label impossible answers with the index of the CLS token.
        input_ids = tokenized_examples["input_ids"][i]
        cls_index = input_ids.index(tokenizer.cls_token_id)

        # Grab the sequence corresponding to that example (to know what is the context and what is the question).
        sequence_ids = tokenized_examples.sequence_ids(i)

        # One example can give several spans, this is the index of the example containing this span of text.
        sample_index = sample_mapping[i]
        answers = examples["answers"][sample_index]
        # If no answers are given, set the cls_index as answer.
        if len(answers["answer_start"]) == 0:
            tokenized_examples["start_positions"].append(cls_index)
            tokenized_examples["end_positions"].append(cls_index)
        else:
            # Start/end character index of the answer in the text.
            start_char = answers["answer_start"][0]
            end_char = start_char + len(answers["text"][0])

            # Start token index of the current span in the text.
            token_start_index = 0
            while sequence_ids[token_start_index] != (1 if pad_on_right else 0):
                token_start_index += 1

            # End token index of the current span in the text.
            token_end_index = len(input_ids) - 1
            while sequence_ids[token_end_index] != (1 if pad_on_right else 0):
                token_end_index -= 1

            # Detect if the answer is out of the span (in which case this feature is labeled with the CLS index).
            if not (
                offsets[token_start_index][0] <= start_char
                and offsets[token_end_index][1] >= end_char
            ):
                tokenized_examples["start_positions"].append(cls_index)
                tokenized_examples["end_positions"].append(cls_index)
            else:
                # Otherwise move the token_start_index and token_end_index to the two ends of the answer.
                # Note: we could go after the last offset if the answer is the last word (edge case).
                while (
                    token_start_index < len(offsets) and offsets[token_start_index][0] <= start_char
                ):
                    token_start_index += 1
                tokenized_examples["start_positions"].append(token_start_index - 1)
                while offsets[token_end_index][1] >= end_char:
                    token_end_index -= 1
                tokenized_examples["end_positions"].append(token_end_index + 1)

    return tokenized_examples
This function works with one or several examples. In the case of several examples, the tokenizer will return a list of lists for each key:
[ ]:
features = prepare_train_features(datasets["train"][:5])
To apply this function on all the sentences (or pairs of sentences) in our dataset, we just use the map method of our dataset object we created earlier. This will apply the function on all the elements of all the splits in dataset, so our training, validation, and testing data will be preprocessed in one single command. Since our preprocessing changes the number of samples, we need to remove the old columns when applying it.
[ ]:
tokenized_datasets = datasets.map(
    prepare_train_features, batched=True, remove_columns=datasets["train"].column_names
)
Before we kick off our SageMaker training job we need to transfer our dataset to S3, so the training job can download it from S3.
[ ]:
train_dataset = tokenized_datasets["train"]
eval_dataset = tokenized_datasets["validation"]

train_dataset.set_format(
    "torch", columns=["attention_mask", "end_positions", "input_ids", "start_positions"]
)
eval_dataset.set_format(
    "torch", columns=["attention_mask", "end_positions", "input_ids", "start_positions"]
)
[ ]:
import botocore
from datasets.filesystems import S3FileSystem

s3 = S3FileSystem()

s3_prefix = "samples/datasets/squad"

# save train_dataset to s3
training_input_path = f"s3://{sess.default_bucket()}/{s3_prefix}/train"
train_dataset.save_to_disk(training_input_path, fs=s3)

# save test_dataset to s3
eval_input_path = f"s3://{sess.default_bucket()}/{s3_prefix}/eval"
eval_dataset.save_to_disk(eval_input_path, fs=s3)
SageMaker Training Job
To create a SageMaker training job, we use a PyTorch estimator. Using the estimator, you can define which fine-tuning script should SageMaker use through entry_point, which instance_type to use for training, which hyperparameters to pass, and so on.
When a SageMaker training job starts, SageMaker takes care of starting and managing all the required machine learning instances, picks up the PyTorch Deep Learning Container, uploads your training script, and downloads the data from sagemaker_session_bucket into the container at /opt/ml/input/data.
In the following section, you learn how to set up two versions of the SageMaker PyTorch estimator, a native one without the compiler and an optimized one with the compiler.
[ ]:
estimator_args = dict(
    entry_point="qa_trainer_huggingface.py",
    source_dir="./scripts",
    instance_type="ml.g5.4xlarge",
    instance_count=1,
    role=role,
    py_version="py39",
    framework_version="1.13.1",
    volume_size=200,
    disable_profiler=True,  # Disabling SageMaker Profiler to avoid overheads during benchmarking
    debugger_hook_config=False,  # Disabling SageMaker Debugger to avoid overheads during benchmarking
    base_job_name="trcomp-pt-example",
)
Next, we define some basic arguments to be passed to the training script.
[ ]:
# Hyperparameters are passed to the training script as arguments.

hyperparameters = {
    "epochs": 10,
    "model_name": "albert-base-v2",
    "n_gpus": 1,
    "output_dir": "/opt/ml/model",
}
Training with Native PyTorch
Below, we run a native PyTorch training job with the PyTorch estimator on a ml.g5.4xlarge instance.
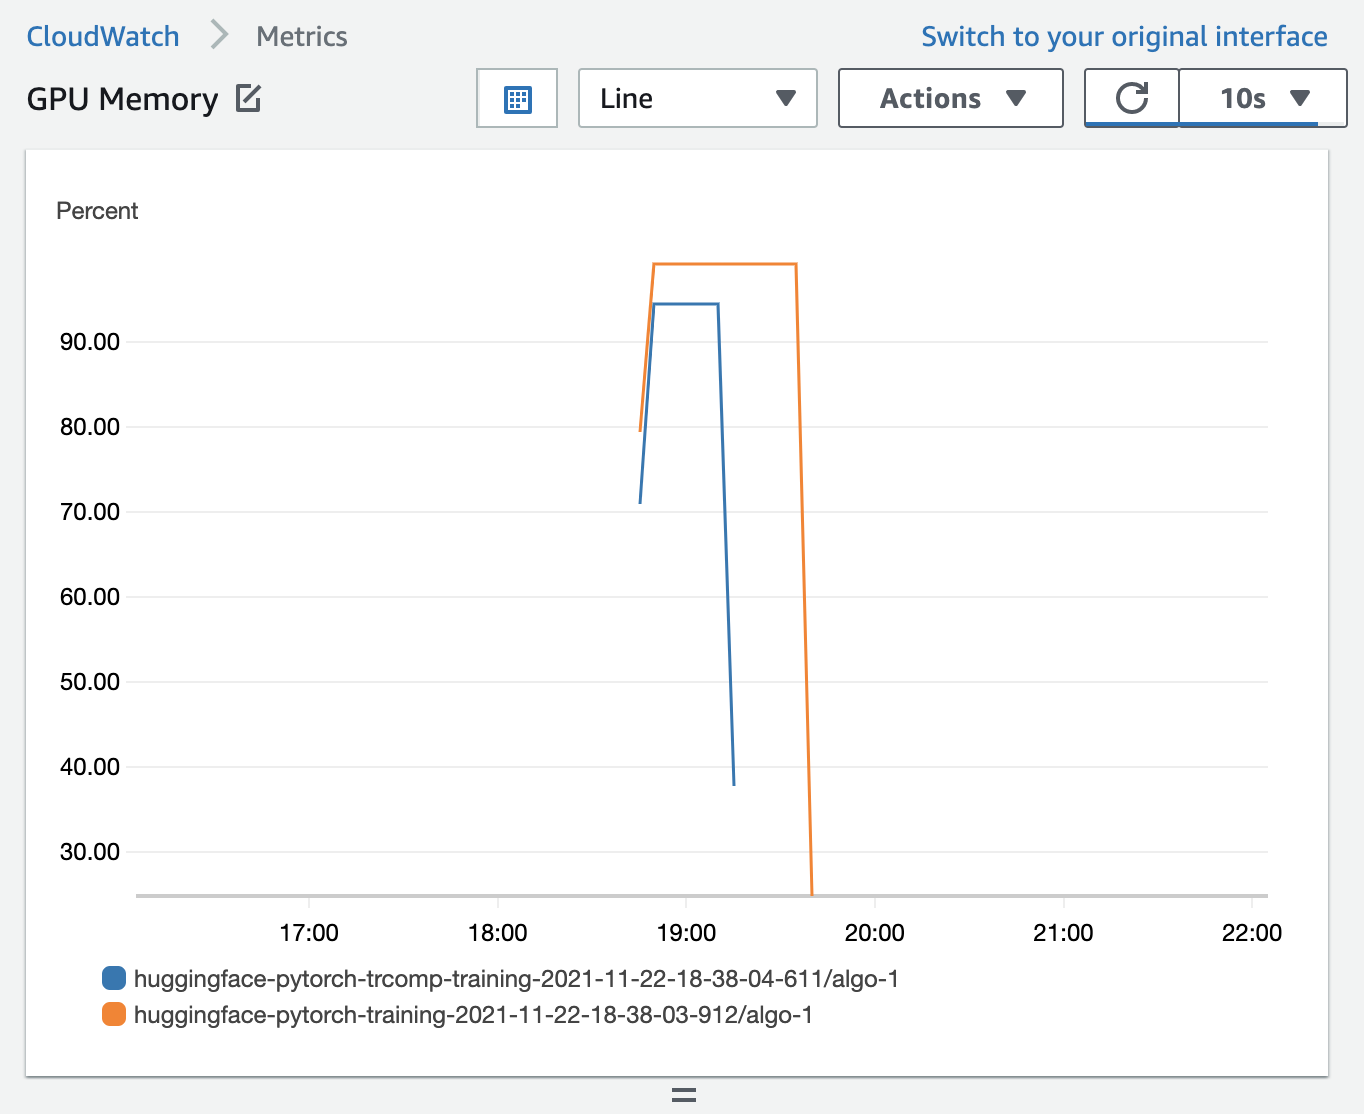
We run a batch size of 28 on our native training job and 52 on our Training Compiler training job to make an apple to apple comparison. These batch sizes along with the max_length variable get us close to 100% GPU memory utilization.
We recommend using the tested batch size that’s provided at Tested Models in the SageMaker Training Compiler Developer Guide.
[ ]:
from sagemaker.pytorch import PyTorch

batch_size_native = 28
learning_rate_native = float("3e-5") / 32 * batch_size_native

native_estimator = PyTorch(
    hyperparameters=dict(
        **hyperparameters,
        **{
            "train_batch_size": batch_size_native,
            "learning_rate": learning_rate_native,
        },
    ),
    **estimator_args,
)

# starting the train job with our uploaded datasets as input
native_estimator.fit({"train": training_input_path, "test": eval_input_path}, wait=False)

# The name of the training job. You might need to note this down in case you lose connection to your notebook.
native_estimator.latest_training_job.name
Training with Optimized PyTorch
Compilation through Training Compiler changes the memory footprint of the model. Most commonly, this manifests as a reduction in memory utilization and a consequent increase in the largest batch size that can fit on the GPU. Note that if you want to change the batch size, you must adjust the learning rate appropriately.
Note: We recommend you to turn the SageMaker Debugger’s profiling and debugging tools off when you use compilation to avoid additional overheads.
We use the tested batch size that’s provided at Tested Models in the SageMaker Training Compiler Developer Guide.
[ ]:
from sagemaker.pytorch import PyTorch, TrainingCompilerConfig

# an updated max batch size that can fit into GPU memory with compiler
batch_size = 70

# update the global learning rate
learning_rate = learning_rate_native / batch_size_native * batch_size

optimized_estimator = PyTorch(
    compiler_config=TrainingCompilerConfig(debug=True),
    hyperparameters=dict(
        **hyperparameters,
        **{
            "train_batch_size": batch_size,
            "learning_rate": learning_rate,
        },
    ),
    **estimator_args,
)

# starting the train job with our uploaded datasets as input
optimized_estimator.fit({"train": training_input_path, "test": eval_input_path}, wait=False)

# The name of the training job. You might need to note this down in case you lose connection to your notebook.
optimized_estimator.latest_training_job.name
[ ]:
# Wait for training jobs to complete.

waiter = native_estimator.sagemaker_session.sagemaker_client.get_waiter(
    "training_job_completed_or_stopped"
)
waiter.wait(TrainingJobName=native_estimator.latest_training_job.name)
waiter = optimized_estimator.sagemaker_session.sagemaker_client.get_waiter(
    "training_job_completed_or_stopped"
)
waiter.wait(TrainingJobName=optimized_estimator.latest_training_job.name)
Analysis
Load information and logs of the training job without SageMaker Training Compiler
[ ]:
# container image used for native training job
print(f"container image used for training job: \n{native_estimator.image_uri}\n")

# s3 uri where the native trained model is located
print(f"s3 uri where the trained model is located: \n{native_estimator.model_data}\n")

# latest training job name for this estimator
print(
    f"latest training job name for this estimator: \n{native_estimator.latest_training_job.name}\n"
)
[ ]:
%%capture native

# access the logs of the native training job
native_estimator.sagemaker_session.logs_for_job(native_estimator.latest_training_job.name)
Note: If the estimator object is no longer available due to a kernel break or refresh, you need to directly use the training job name and manually attach the training job to a new PyTorch estimator. For example:
native_estimator = PyTorch.attach("your_native_training_job_name")
Load information and logs of the training job with SageMaker Training Compiler
[ ]:
# container image used for optimized training job
print(f"container image used for training job: \n{optimized_estimator.image_uri}\n")

# s3 uri where the optimized trained model is located
print(f"s3 uri where the trained model is located: \n{optimized_estimator.model_data}\n")

# latest training job name for this estimator
print(
    f"latest training job name for this estimator: \n{optimized_estimator.latest_training_job.name}\n"
)
[ ]:
%%capture optimized

# access the logs of the optimized training job
optimized_estimator.sagemaker_session.logs_for_job(optimized_estimator.latest_training_job.name)
Note: If the estimator object is no longer available due to a kernel break or refresh, you need to directly use the training job name and manually attach the training job to a new PyTorch estimator. For example:
optimized_est = PyTorch.attach("your_optimized_native_training_job_name")
Create helper functions for analysis
[ ]:
from ast import literal_eval
from collections import defaultdict
from matplotlib import pyplot as plt


def _summarize(captured):
    final = []
    for line in captured.stdout.split("\n"):
        cleaned = line.strip()
        if "{" in cleaned and "}" in cleaned:
            final.append(cleaned[cleaned.index("{") : cleaned.index("}") + 1])
    return final


def make_sense(string):
    try:
        return literal_eval(string)
    except:
        pass


def summarize(summary):
    final = {"train": [], "eval": [], "summary": {}}
    for line in summary:
        interpretation = make_sense(line)
        if interpretation:
            if "loss" in interpretation:
                final["train"].append(interpretation)
            elif "eval_loss" in interpretation:
                final["eval"].append(interpretation)
            elif "train_runtime" in interpretation:
                final["summary"].update(interpretation)
    return final
Training Throughput Plot
The following script creates a plot that compares the throughput (number_of_samples/second) of the two training jobs with and without SageMaker Training Compiler.
[ ]:
n = summarize(_summarize(native))
native_throughput = n["summary"]["train_samples_per_second"]

o = summarize(_summarize(optimized))
optimized_throughput = o["summary"]["train_samples_per_second"]

avg_speedup = f"{round((optimized_throughput/native_throughput-1)*100)}%"

plt.title("Training Throughput \n (Higher is better)")
plt.ylabel("Samples/sec")

plt.bar(x=[1], height=native_throughput, width=0.35)
plt.bar(x=[1.5], height=optimized_throughput, width=0.35)

plt.xlabel("  ====> {} faster <====".format(avg_speedup))
plt.xticks(ticks=[1, 1.5], labels=["Baseline PT", "Training Compiler PT"])
plt.show()
Training Stats
Let’s compare various training metrics with and without SageMaker Training Compiler. SageMaker Training Compiler provides an increase in training throughput which translates to a decrease in total training time.
[ ]:
import pandas as pd

pd.DataFrame([n["summary"], o["summary"]], index=["Native", "Optimized"])
[ ]:
# calculate percentage speedup from SageMaker Training Compiler in terms of total training time reported by HF
speedup = (
    (n["summary"]["train_runtime"] - o["summary"]["train_runtime"])
    * 100
    / n["summary"]["train_runtime"]
)
print(
    f"SageMaker Training Compiler integrated PyTorch is about {int(speedup)}% faster in terms of total training time as reported by HF."
)
Billable Time
The following script creates a plot that compares the billable time of the two training jobs with and without SageMaker Training Compiler.
[ ]:
def BillableTimeInSeconds(name):
    describe_training_job = (
        optimized_estimator.sagemaker_session.sagemaker_client.describe_training_job
    )
    details = describe_training_job(TrainingJobName=name)
    return details["BillableTimeInSeconds"]
[ ]:
Billable = {}
Billable["Native"] = BillableTimeInSeconds(native_estimator.latest_training_job.name)
Billable["Optimized"] = BillableTimeInSeconds(optimized_estimator.latest_training_job.name)
pd.DataFrame(Billable, index=["BillableSecs"])
[ ]:
speedup = (Billable["Native"] - Billable["Optimized"]) * 100 / Billable["Native"]
print(f"SageMaker Training Compiler integrated PyTorch was {int(speedup)}% faster in summary.")
Convergence of Training Loss
The following script creates a plot that compares the loss function of the two training jobs with and without SageMaker Training Compiler.
[ ]:
native_loss = [i["loss"] for i in n["train"]]
native_epochs = [i["epoch"] for i in n["train"]]
optimized_loss = [i["loss"] for i in o["train"]]
optimized_epochs = [i["epoch"] for i in o["train"]]

plt.title("Plot of Training Loss")
plt.xlabel("Epoch")
plt.ylabel("Training Loss")
plt.plot(native_epochs, native_loss, label="Baseline PT")
plt.plot(optimized_epochs, optimized_loss, label="Training Compiler PT")
plt.legend()
plt.show()
Conclusion
In this example, we fine-tuned an ALBERT model (albert-base-v2) with the SQuAD dataset and compared a native training job with a SageMaker Training Compiler training job. The Training Compiler job has 93% higher throughput and 38% quicker training time while training loss was equal with the native PyTorch training job.
Clean up
Stop all training jobs launched if the jobs are still running.
[ ]:
import boto3

sm = boto3.client("sagemaker")


def stop_training_job(name):
    status = sm.describe_training_job(TrainingJobName=name)["TrainingJobStatus"]
    if status == "InProgress":
        sm.stop_training_job(TrainingJobName=name)


stop_training_job(native_estimator.latest_training_job.name)
stop_training_job(optimized_estimator.latest_training_job.name)
Also, to find instructions on cleaning up resources, see Clean Up in the Amazon SageMaker Developer Guide.
Notebook CI Test Results
This notebook was tested in multiple regions. The test results are as follows, except for us-west-2 which is shown at the top of the notebook.